
Way back in August of 2022, I blogged about our Backyard Glow Up. It hadn’t happened yet, we were waiting for the patio guy to get started. Our plan was to add privacy and landscaping after the patio was finished. The patio ended up having some issues and needed to have part of it redone […]
Faux Sharpie Herringbone Back Splash for $3

Last week we purchased some new appliances for our home after our microwave of 4 years died. We decided it was the right time to also purchase a gas range and dishwasher as those weren’t the best either. Don’t ask me about my Samsung kitchen appliances because I hated them and now we only have the […]
Our Home Then & Now

I was looking for some photos the other day and came across the pics from when our home was for sale by the previous owners. So the furniture pictured in the before photos does not belong to us but it’s fun to see how the home was staged when we looked at it. Scroll down […]
Surprise Master Bedroom Client Makeover

The other week I was contacted by a husband to surprise his wife with a little master bedroom and bath makeover. What a wonderful idea and I was so happy to help. Hopefully they both love what I did in there because I spent every last penny I was given! The room didn’t need a […]
Adding bling to the back of the bookshelf
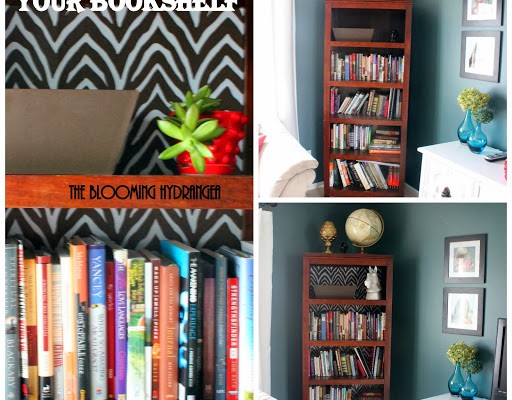
While wandering through TJ Maxx one day, I found this awesome zebra contact paper on clearance for $3. I have held onto this paper, hoping to use it in my home someday but not really sure when or on what. Originally I was thinking maybe for my hubby’s office but he was not a big […]
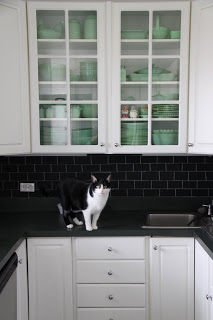
Chalkboard Subway Tile Backsplash & My Kitchen
Don’t you love when inspiration hits? It’s a drop everything, I need to do this now kind of thing for me so when I saw Carmel’s Chalkboard Brick Fireplace Makeover on Monday, I was hit hard with inspiration! Which reminded me of The Nester’s chalkboard fireplace that I have always loved. Then I did a quick […]
The Laundry Room (again)
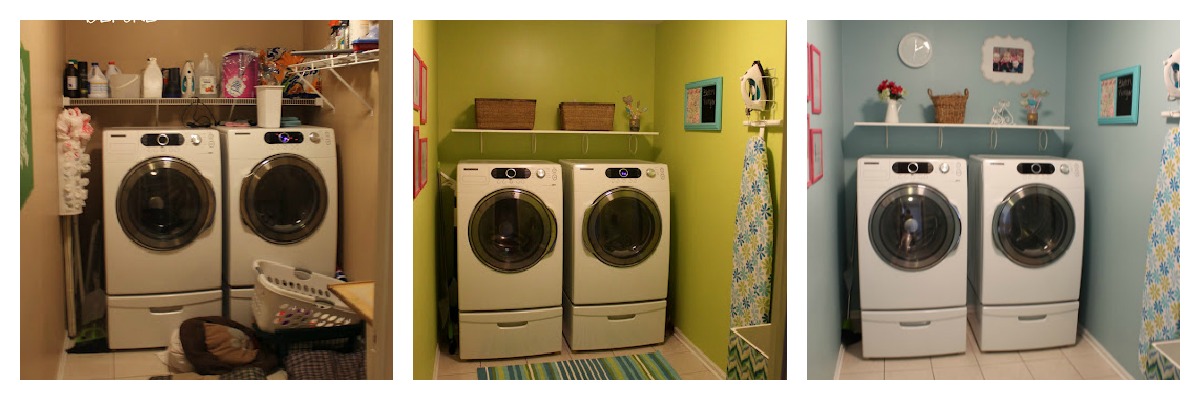
If you follow me on fb or instagram then you already know that I repainted the laundry room in January. In August last year I had enough of the beige turd look and I was just ready for a laundry room that was clean and pretty, you can see the original post here. I mean […]
Anna’s Room Makeover
Last Friday after a great lunch date, my friend Heidi and I were hanging at my house chatting. She said she wanted to give her soon to be 8 year old daughter a bedroom makeover for her birthday. Her daughter had decided that the pink in her bedroom wasn’t working for her anymore and she […]
Black French Doors – Updating our Home

This past fall we decided to finally make our formal living room my hubby’s office and a library/music area. This room is large and we have some great plans for it but first we needed some french doors so my man could work without hearing all the household noises. Lowes was our go to […]
DIY Entertainment Center Into a Play Kitchen

UPDATE: This kitchen has been pinned a lot. I have since reshot pics of the play kitchen with better lighting and a better camera. The pictures towards the bottom of the post are the original but if you want to pin this, I suggest using the newer pics which are now first. Thanks to Pinterest […]